Add a Custom Block
Blocks are items which may be added to the sidebar of any page in Moodle. In this example, we’ll add a block with a list of student resources.
Part 1: Add the block
- Find the “Add a Block” menu (usually at the bottom of the left sidebar on your Moodle course).
- Select HTML from the dropdown.
Part 2: Add the content
- For our example, we’ll leave the “HTML block title” empty.
- Add your content to the “Content” text area. Anything you add in this text area will display in your block in the sidebar. To make the Resource list in the example:
- Click the code (</>) icon to access the html editor (you may have to click the toolbar toggle in the upper left to see the html editor icon).
- In the textbox that opens, copy and paste the following “Text block content” HTML:
See the Pen Resources Block by Amy Spielmaker (@akspiel) on CodePen.
Part 3: Set the display settings
- In the “Where this block appears” section, choose where you want the block to display. For the Resources block in the example, I chose Any page.
- Both Any page and Any course page will make the block appear on every page, including the main course page, content pages, and assignments.
- Any type of course main page will make the block appear only on your main Moodle page.
- In the “Region” field, choose Left or Right. I chose left to have the block be in the left sidebar.
- The “Weight” field determines the order of blocks.
- A lower number means the block will be higher on the page (above other blocks).
- A higher number means the block will be lower on the page (below other blocks).
- In the “On this page” section, you can change the block display settings on a per-page basis. I’m just going to leave it as is.
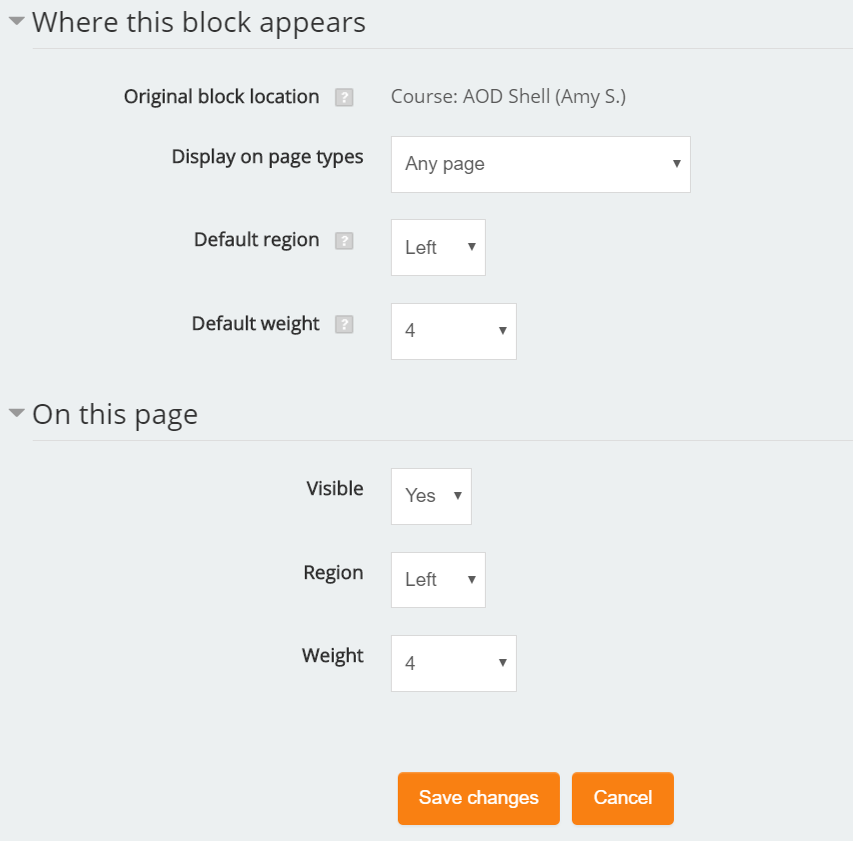
My block display settings - Click Save changes.